
Commodore Plus/4 Power Supply Pinout
What sits on each contact of the Plus/4's 4-pin square DIN power connector, why Commodore used the same +5V and 9V AC pair as the C64, and how a C128 plug relates to it.
August 10, 2026
The Plus/4 belongs to the same Commodore power family as the C64 and the C128: a regulated +5V DC rail and a 9V AC rail, arriving together through one connector. What changes is the shell — a 4-pin square DIN, with no centre contact.
That makes three different Commodore shells carrying broadly the same two rails, which is exactly the situation where people reach for an adapter without checking the current rating behind it.
Read this first. Contact positions are shown as you look into the socket on the computer, with the keyway at the top. Looking at the plug instead mirrors the picture left-to-right. Confirm every rail with a multimeter before you solder anything.
The power connector
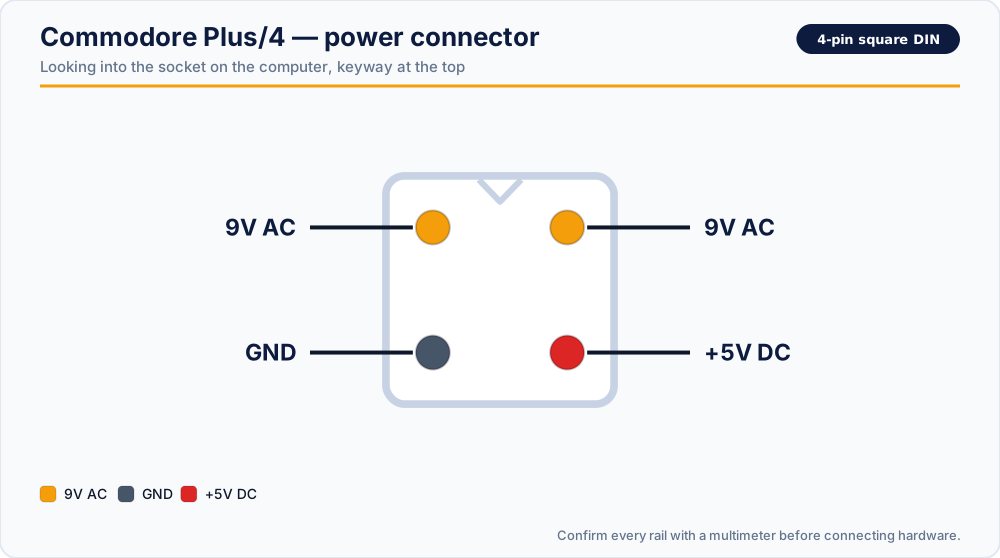
| Position | Rail |
|---|---|
| Upper left | 9V AC |
| Upper right | 9V AC |
| Lower left | GND |
| Lower right | +5V DC |
All four contacts are labelled — no unknowns here.
As on every Commodore machine that takes AC, the two contacts marked 9V AC are not duplicates. Alternating current has no fixed polarity, but it still needs two conductors, and these are the two legs of the transformer's secondary winding. Neither is "the positive one", and leaving either off means the AC rail does not exist.
The +5V rail returns through the single GND contact.
What each rail does
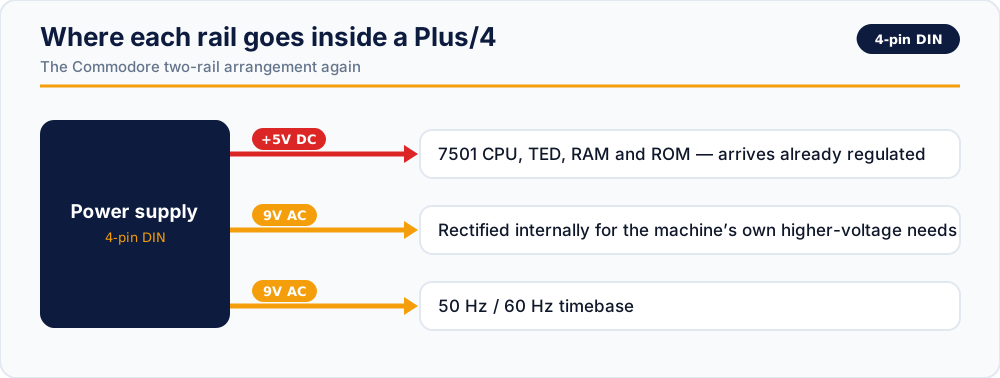
+5V DC
Runs the 7501 CPU, the TED chip that handles both video and sound, the RAM and the ROM. It arrives from the supply already regulated — there is no second regulator inside the computer standing between the brick and the chips.
This is the same arrangement that gives the C64 its reputation, and it carries the same consequence: when an original brick's regulator fails short, it passes its unregulated input straight onto a 5V bus, and the machine does not survive it. Measuring the rail is the cheapest insurance available.
9V AC
Left as alternating current deliberately. The machine rectifies it internally for its own higher-voltage needs, and uses its 50 Hz / 60 Hz waveform as a timebase.
That second use has the same visible consequence it has on a C64: a machine running on a supply whose AC frequency does not match what its software expects will keep incorrect time in anything that counts those cycles. Nothing is damaged — the clock is simply counting at a different rate than the program assumes.
It also explains why a DC adapter cannot stand in for this rail. There are no cycles to count in DC, and no waveform to multiply.
What our replacement delivers
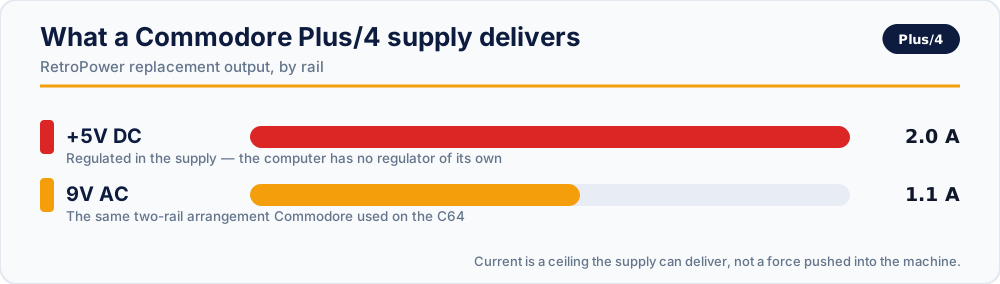
| Rail | Output |
|---|---|
| +5V DC | 2.0 A, stabilised, anti-ripple filtered |
| 9V AC | 1.1 A, transformer-generated |
With over-voltage and over-current protection, fusing on both the AC and DC sides, and full isolation between them.
How it relates to the C64 and C128 supplies
The rails carry the same names across all three machines, which is what makes substitution tempting and occasionally expensive:
| Shell | +5V DC | 9V AC | |
|---|---|---|---|
| Commodore 64 | 7-pin round DIN | 2.0 A | 1.1 A |
| Commodore Plus/4 | 4-pin square DIN | 2.0 A | 1.1 A |
| Commodore 128 | 5-pin square DIN | 3.0 A | 1.1 A |
The Plus/4 and the C64 ask for the same amount. The C128 asks for a full amp more on the 5V rail, because of the extra RAM, the second CPU and the VDC.
If you adapt between shells, adapt upward in capacity, never downward. A C128-rated supply will run a Plus/4 comfortably. A Plus/4 supply asked to run a C128 is running permanently at its limit, which is how a healthy brick becomes a failing one — and a failing brick is the thing that takes the computer with it.
An adapter changes the shape of the plug. It never changes the capacity of the supply behind it.
Checking a supply before you trust it
With the supply on mains and disconnected from the computer, probe the plug.
- DC volts between the lower-right contact and the lower-left GND contact — expect a steady reading very close to 5.0 V.
- AC volts between the two upper contacts — between the two AC legs, not from one leg to GND. Expect roughly 9 V AC.
- Leave it running and watch the DC figure. Upward drift as the case warms is a failing regulator announcing itself.
- Above roughly 5.2 V DC, stop. Do not connect it to the machine to see what happens.
Replacement supplies
- RetroPower PSU Commodore Plus/4 — US plug · International plug
- RetroPower PSU Commodore Plus/4 with OLED display — US plug · International plug
Related reading
- Commodore 64 power supply pinout — same two rails, round 7-pin shell
- Commodore 128 power supply pinout — same two rails, more current
- Which power supply do I need?
Vintage power supplies carry mains voltage inside, and can hold dangerous charge after being unplugged. If you are not experienced with mains electricity, do not open one.